

The Science of Buoyancy: Why Your Body Floats (and Why Legs Sink)
To learn how to float, start by relaxing your body, taking a deep breath to fill your lungs with buoyant air, and leaning back until your ears are fully submerged with your chin tilted toward the sky. Spread your arms and legs into a wide starfish shape, lift your chest toward the surface, and use gentle sculling hand motions beneath the water if your legs begin to settle downward.
Understanding why we stay on top of the water takes the mystery out of swimming. Floating is governed by physics, specifically Archimedes’ principle, which states that any object placed in fluid is buoyed upward by a force equal to the weight of the fluid it displaces.
Whether you float effortlessly or feel like an anchor comes down to relative tissue density:
- Air in the lungs: Highly buoyant. A full adult inhale adds roughly 4 to 6 liters of low-density air to your chest, boosting your natural lift significantly.
- Body fat: Has a density of roughly 0.90 g/cm³, which is lighter than fresh water (1.00 g/cm³).
- Lean muscle tissue: Has a density of about 1.06 g/cm³, making it denser than fresh water.
- Bone mass: Averages a density of roughly 1.75 g/cm³, meaning it naturally tends to settle downward.
Your individual body composition shapes how your body rests in the water, but proper technique bridges the buoyancy gap for every swimmer.
Center of Gravity vs. Center of Buoyancy
Your body has two competing balance points in the water: your center of gravity (located near your hips/pelvis) and your center of buoyancy (located higher up in your chest where your inflated lungs sit).
Because these two centers are not in the same spot, your upper torso naturally wants to rise while your heavier lower half wants to drop. This pivot is known as the “torpedo effect.” When beginners take slow easy swim lessons for beginners, they learn how to counterbalance this pivot by adjusting limb placement and engaging their core instead of tensing up.
Why Everyone Can Learn How to Float Regardless of Body Type
Many athletic or lean individuals believe they are simply “built to sink.” While denser muscle mass means your legs will naturally ride lower in the water, this does not prevent you from maintaining a safe, calm float.
Your head accounts for roughly 8% of your total body weight. When you tuck your chin to check on your feet, that heavy head acts as a lever, forcing your hips downward. By tilting your head back, submerging your ears, opening your chest, and adding dynamic sculling hand support beneath the surface, anyone can keep their airway completely clear without burning energy.
Step-by-Step Guide: How to Learn How to Float in 4 Easy Stages
Mastering horizontal trim requires practical adjustments tailored to your build. Below is a quick comparison of adjustments based on body type:
| Body Type / Trait | Natural Buoyancy Tendency | Optimal Arm Position | Leg & Hip Adjustment | Breathing Strategy |
|---|---|---|---|---|
| Higher Body Fat Ratio | High natural lift across torso and hips | Starfish shape at shoulder height | Straight, relaxed legs near surface | Rhythmic, continuous belly breathing |
| Lean / Highly Muscular | Dense lower half; sinking legs | Overhead “Superman” or streamline | Softly bent knees; slight hip drop | Deep inhales with shallow, controlled exhales |
| Long-Limbed / Tall | Leverage causes hip dipping | Wide V-shape overhead | Allow feet to rest lower in water | Diaphragmatic breathing to keep chest expanded |
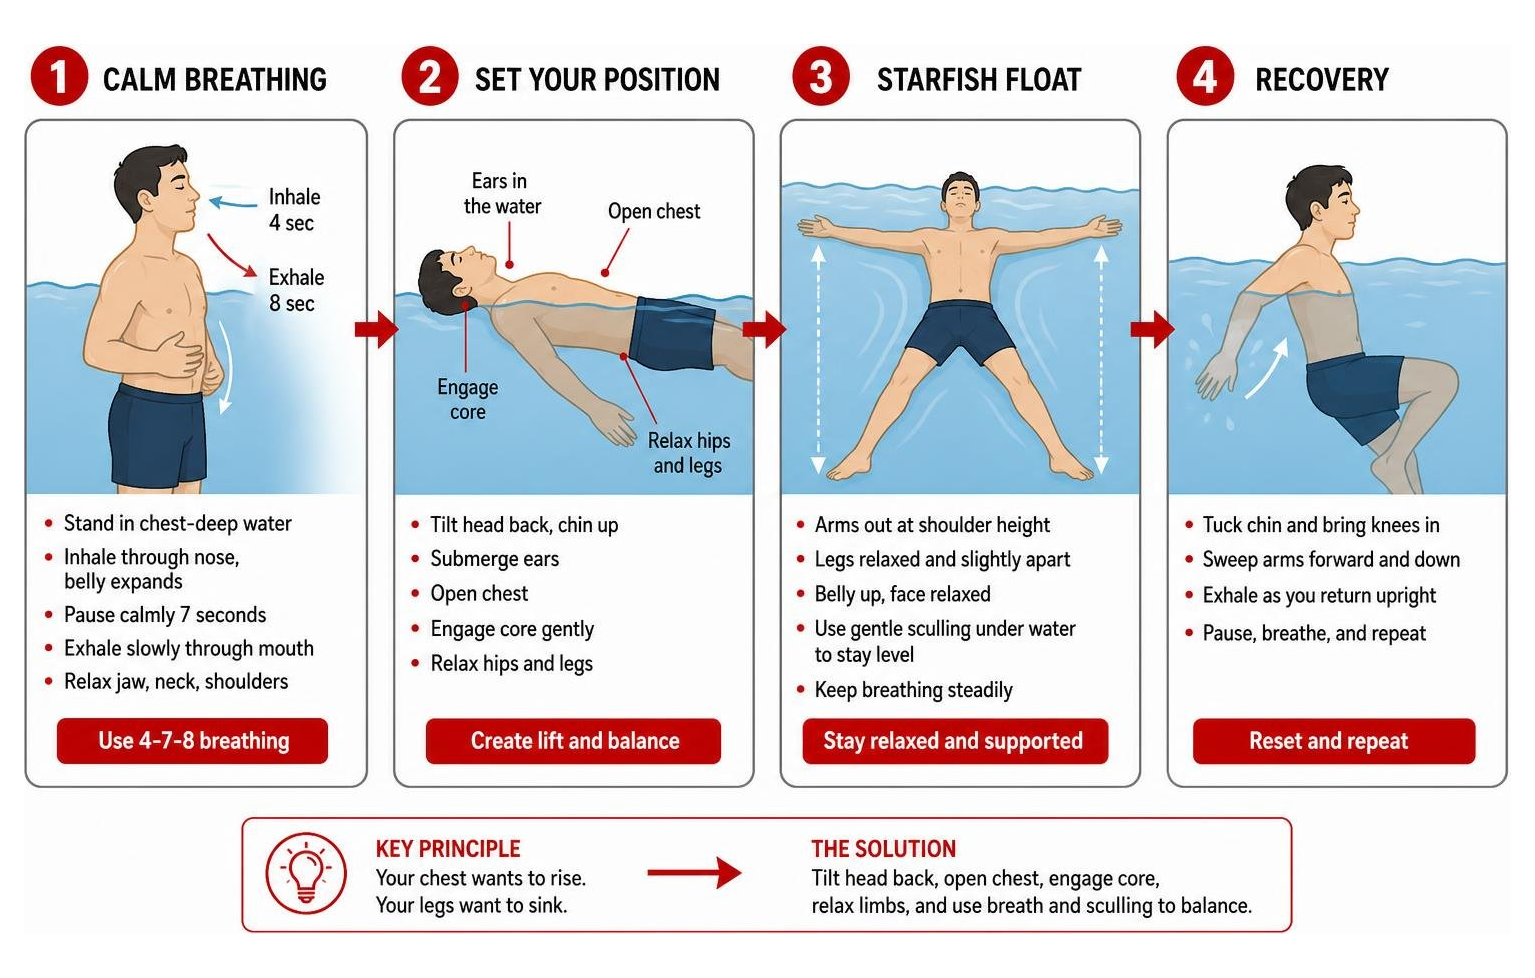
Step 1: Regulate Your Nervous System and Master Diaphragmatic Breathing
When you feel anxious in the water, your body instinctively tenses, which increases your overall density and makes you feel heavy. Before attempting to float, stand comfortably in chest-deep water and practice diaphragmatic breathing. Inhale through your nose so your belly expands, then exhale slowly through your mouth.
Using helpful tips for learning to swim, practice the 4-7-8 breathing method: inhale for 4 seconds, pause calmly for 7 seconds, and exhale steadily for 8 seconds. This activates your parasympathetic nervous system, lowering your heart rate and releasing tension from your jaw, neck, and shoulders.
Step 2: Establish the Starfish Float Position
Once your breathing is steady, transition into the starfish float. Lean back gently in shallow water, allowing the water to support the back of your head.

- Submerge your ears: Keep your ears completely underwater. If water splashes lightly on your forehead, you are in the correct horizontal alignment.
- Look straight up: Fix your gaze on the ceiling or sky. Never look down at your toes.
- Lift your sternum: Arch your upper back slightly and press your chest toward the surface.
- Spread wide: Extend your arms and legs into a wide “X” shape to maximize surface area and water displacement.
Step 3: Counteract Sinking Legs with Superman Arms and Sculling
If your legs begin to settle toward the bottom, do not panic or thrash. Use these gentle adjustments:
- Move arms to “Superman” position: Slide your arms from your sides up past your shoulders into an overhead “Y” or “I” position. Moving that upper-body weight above your head shifts your center of gravity closer to your lungs.
- Bend your knees slightly: Letting your lower legs relax downward reduces the lever force pulling your hips down.
- Use sculling hand motions: Keep your hands completely submerged. Turn your palms outward at a slight angle and sweep them away from your body, then angle them inward and sweep them back in a continuous figure-eight motion. This creates continuous upward lift using your hands and forearms like gentle paddles.
- Add a soft hip flutter: A slow, effortless flutter kick from the hips can provide just enough forward lift to keep your heels near the surface.
Step 4: Master the Safe Standing Recovery
Knowing how to stand up safely gives you the confidence to practice without fear. To recover from a back float to your feet:
- Tuck your knees: Draw both knees smoothly toward your chest.
- Sweep downward: Press both hands downward and forward through the water to lift your upper body.
- Bring head forward: Bring your chin gently toward your chest as your torso rotates upright.
- Plant your feet: Extend your legs straight down and plant your feet firmly on the pool floor before wiping your eyes.
Essential Drills to Build Muscle Memory and Water Comfort
Building comfort in the water takes repetition. In our beginner swimming lessons for adults, we guide swimmers through progressive drills that build lasting muscle memory.
Wall-Assisted and Buddy-Supported Floats
Start by standing with your back against the pool wall. Place your hands on the edge, lean back until your ears are submerged, and gently lift your hips. Once stable, release the wall for 2 to 3 seconds at a time while focusing on smooth breathing.
When working with an instructor or buddy, have them place a supportive hand under the small of your back. As you relax, they can slowly lower their hand, giving you tactile feedback as you hold neutral buoyancy independently.
How to Safely Learn How to Float on Your Back and Recover
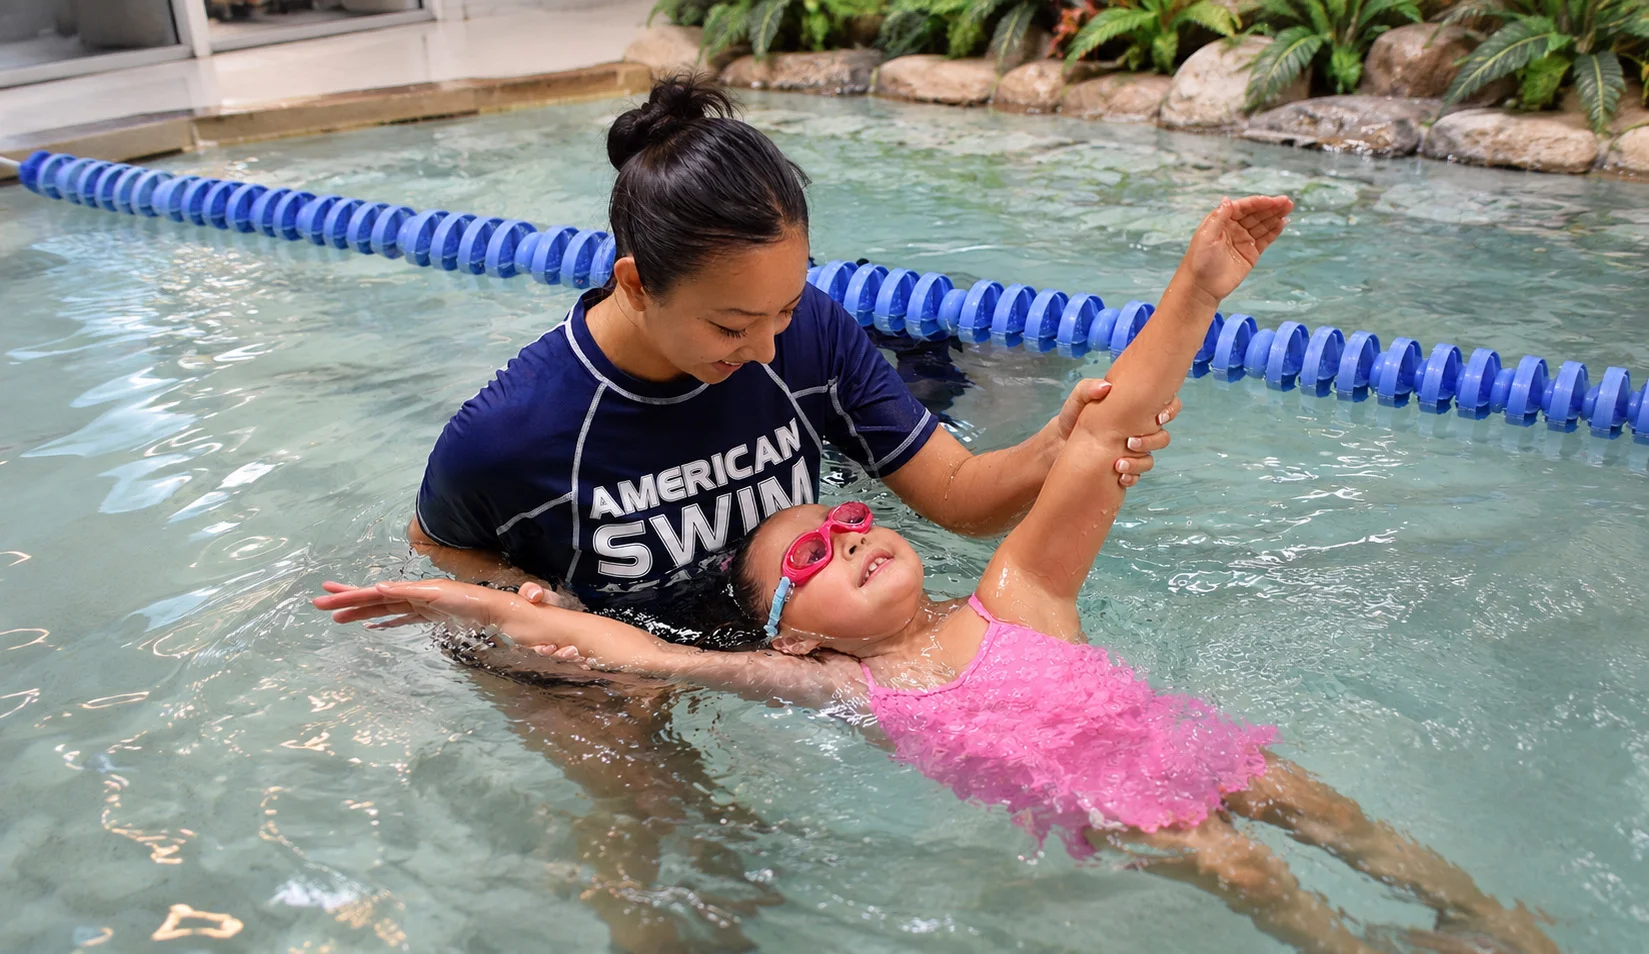
Practice transitioning between shapes in shallow water. You can start in a tucked mushroom float (curled up face-down for just a few seconds), then roll gently onto your back, open your arms and legs wide, and settle into a calm back float. This drill teaches your body how buoyancy shifts as your shape changes, building instinctive water confidence.
Frequently Asked Questions About Floating in Water
Is it easier to float in saltwater or freshwater?
It is significantly easier to float in saltwater. Ocean water has a higher density (~1.025 g/cm³) than freshwater (1.00 g/cm³) due to dissolved salts and minerals. This provides roughly 2.5% more upward buoyant force, making your body sit noticeably higher at the surface.
How long does it typically take to learn to float?
Most adults and children can achieve a basic, supported back float in shallow water within 2 to 5 practice sessions. Developing the relaxed muscle memory needed to float comfortably for extended periods in deep water typically takes 3 to 6 weeks of consistent practice.
What should I do if I feel anxious or start to sink?
If anxiety creeps in, resist the urge to lift your head or flail. Unclench your jaw, keep your ears in the water, take a deep belly inhale, and use small sculling motions with your hands. If you need a break, simply tuck your knees to your chest, sweep your hands down, and stand up on the pool floor.
Conclusion
Floating is not a test of strength—it is an exercise in relaxation, breath awareness, and trust in the water. Once you master the mechanics of buoyancy and head positioning, staying afloat becomes an effortless, restful skill that opens the door to a lifetime of swimming enjoyment.
At American Swim Academy, our year-round indoor pools are kept at a comfortable 92 degrees, creating the ideal environment for your muscles to relax and your water confidence to flourish. Whether you are introducing your child to the water or learning as an adult, explore our beginner swim programs across our Bay Area locations—including Fremont, Newark, Livermore, Dublin, and Walnut Creek, CA—and let our caring instructors help you feel right at home in the pool.